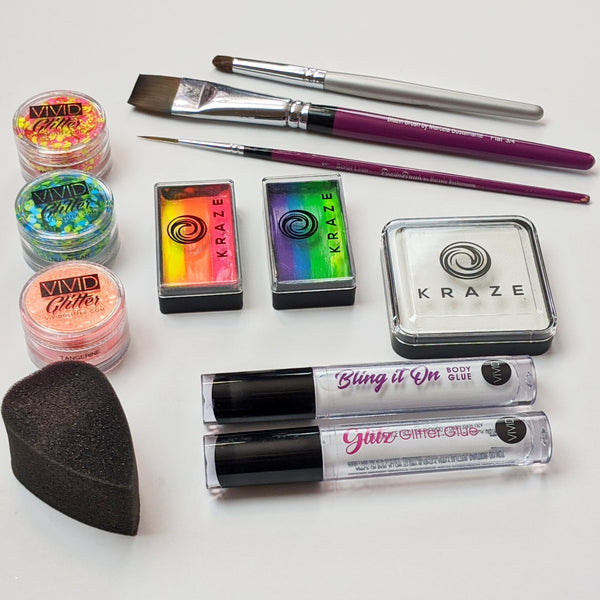
I am crazy about Kraze Fx!!! The combinations of these new bright, bold colors, and the unique dome option makes them a must have in my kit! As you may know, I love all things VIVID and bold, so of course when I saw these new color combos I had to get my hands on them.
I have had the opportunity to try many of the paints in this line and I can honestly say, it is now my absolute favorite.

What first drew me to the Kraze Fx line was their unique dome-strokes. Before these nifty dome-strokes, all we had was flat paint cakes which after a few uses begin to slowly wear down in the middle. Your flat brush begins to take a U shape upon loading and after a few additional loads, you touch bottom and basically it’s ready for the dump.
I have thrown out so much paint for this reason!
Kraze has done us all the convenience of molding the one-strokes into the raised midsection which provides a smooth even load for an extended time. The cake wears down nice and evenly which has many benefits. This method keeps your paint brush flat upon loading, preventing the paint colors from mixing and helping you create sharp clean rainbows on your face paintings.
Another benefit is because this system allows the brush to soak up most of the paint in an even manner, your cake will go much further and you won’t need to throw valuable paint away.

I got my hands on some of their new NEON strokes recently and I love the combinations! Don’t expect the colors to go on super opaque because neons go on slightly transparent especially with a paintbrush. I enjoyed creating this bright mask using 2 lovely combinations called ‘Glow’ and ‘Thrill’.

Step 1
Load the fabulous Kraze Fx petal sponge with the yellow at the tip of the sponge stroking the cake in a perpendicular manner. You will only be loading half of the sponge with the rainbow.

Tap the inner corner of the eyelid with the point until you get a nice coverage of the yellow filled in, and bring it towards the nose. Then lay the sponge flat over the eyelid tapping it to cover the rest of the eye with the orange and pink. Flip the teardrop sponge so that the dark color is at the bottom and sponge it right between the eyes to fill in that area. With a moistened smoothie blender add ‘Tangerine’ fine Vivid Glitter on the eyelids.

Step 2
Load ‘Thrill’ on a ¾ Flat Blazin Brush and paint from the outside corner of the eye swooping under and tapering towards the inner corner. Repeat for each eye. Next add 2 strokes above each eye spread apart to leave room for another set of strokes in between. (See photo) Next, blend any rough areas under the eyes with a lightly moistened contour blending brush.

Step 3
Load a ⅝ angled Blazin Brush with the light color at the long tip of the brush and starting with the middle create a point by positioning the brush vertically then lay the brush to its side and bring it back down at an angle. Do this on both sides creating a nice pointed raised center and continue to paint a similar stroke next to it on both sides until you have a nice crownlike centerpiece.
Add additional similar strokes between the green ones where you left spaces and round out the outer eye area tapering into the outer corner of the eye.
Add a few additional small strokes on the outer corners of the eyes angling towards the corners and again in the inner corners angling up towards the center.
Add lips and now you have your full base complete.

Step 4
Time to add bling and Vivid Glitter ‘Nu-Ocean’ and ‘ Antigravity’! I started by covering the back of my bling with Bling it On Body Glue by Vivid and I placed it in the center. Next I dabbed Glitz Glitter Glue to the areas where I desired the chunky glitters. With a silicone tip applicator I applied the loose Vivid Glitter on top.

Step 5
Using a Script Liner #1 Blazin Brush I lined some of the edges and created several teardrops and swirls to complete the design.

Thank you for taking the time to read this blog post. I hope you enjoyed it!
Follow me on IG @vividjackie


 FREE SHIPPING FOR USA ORDERS OVER $100


Leave a comment (all fields required)