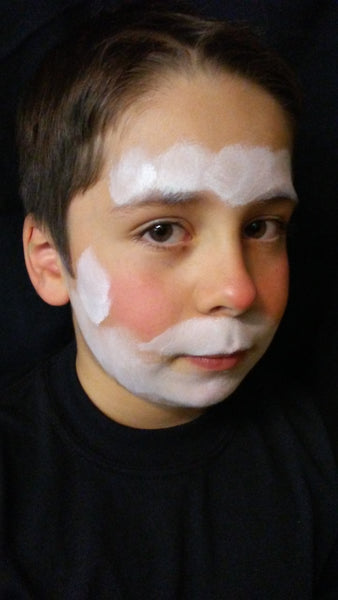
Tis the season for holiday face painting! So to get ready, I used a little holiday magic to whip up this quick and easy Santa Claus design.
Materials
Mikim FX Round Sponges (halved)
Tutorial
Step 1
Mix a little red and gold to create a rosy glow on the cheeks and the tip of the nose. Remember it's cold in the North Pole. Next, pick up some glycerin based white and create a white puff on the cheek for the end of his cap. Add white circles across the forehead. Using the same sponge create his beard and mustache.

Step 2
Load a sponge with red and fill in the top of the forehead bringing down the red as it tapers and meets the puff of his cap. With a sponge loaded with a glycerin based black darken his red cap with where the hat would naturally fold.

Step 3
Load a soft blue and highlight the white area. This creates a frosty depth and adds some interest. You can skip this step for extra busy events. On both cheeks with a mostly dry white, sponge a half round shape for the lenses.

Step 4
With a size 3 round brush loaded with a waxy white outline all the white areas. Create swirls for a more detailed effect. Load a #2 round with your line work black to outline the lenses and connect them over the nose and up the sides of the face. Add a few highlights with your white on the lenses and the frames. Now all your missing are your reindeer and your sleigh. Merry Christmas!

Learn More
I hope you enjoyed my blog! Don't forget to share it with your friends on social media!!
Check out our channel and subscribe! New tutorials and product reviews every week!
CHANNEL: https://www.youtube.com/user/facepaintify or see our Easy Designs Playlist
Like us on Facebook and let us know how we're doing!
FACEBOOK: https://www.facebook.com/FacePaintcom/
Thanks for reading! I’d love to see your Santa Claus! Tag me on Facebook via https://www.facebook.com/Arsenicnlace or
@eyerizbodyart on Instagram
Happy Painting!!
 FREE SHIPPING FOR USA ORDERS OVER $100


Dizzy Doodle
December 27, 2017
Love the extra details of swirls in the white and blue in the beard! Adorable! ?